Gross-Serie sei Dank ist das Nachrüsten eines Kickstarters in die SE-Version ohne Probleme möglich. Der Gehäusedeckel auf der Kupplungsseite ist mit einem Blindstopfen versehen, durch den die Kickstartwelle geführt wird. Man muss lediglich die fehlenden Teile einbauen. So erhält man ein Backup, falls einmal das E-Startsystem unterwegs streiken sollte.
There is no big problem retrofitting the kickstart in the SE-model. The clutch-housing cover has a dummy plug for the kickstart spindle. You only have to install the missing parts. So you have a backup-system for your starter motor.
Benötigte Teile: Alles, was auf dem Microfiche Kickstarter aufgeführt ist, zusätzlich das Leerlaufrad der Kickstarterwelle samt Laufhülse sowie den Gehäuse-Simmerring. Zur Sicherheit noch eine Gehäusedeckeldichtung, denn wenn man keine hat, geht die Dichtung bestimmt kaputt… Die Sicherungssichel war bei meiner SE trotz nicht vorhandenem Leerlaufrad verbaut!
Spezialwerkzeug: Drehmomentschlüssel und Halter zum Fixieren des Kupplungskorbs.
Required parts:
You need all parts that are listed on the Microfiche: „kickstart“ and the idler gear of the kickstart spindle with bushing as well as the radial shaft seal. To be on the safe side you can get a clutch cover sealing ready. Remark: the crescent-shaped securing plate was already installed at my SE-model!
Special tools: torque wrench, clutch cage arrester.
Vorgehensweise:
How to start:
 Nachdem der Fussbremshebel und die Fussraste abgeschraubt, der Kupplungszug ausgehangen, das Öl abgelassen, der Gehäusedeckel und der Kupplungskorb abgebaut wurde, hat man freien Blick auf die “Innereien”.
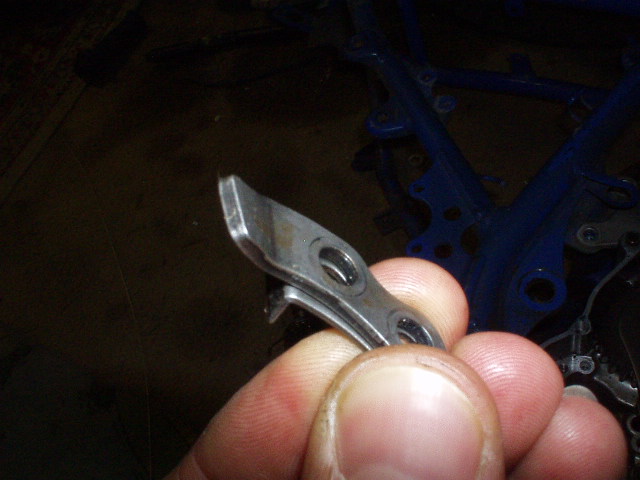
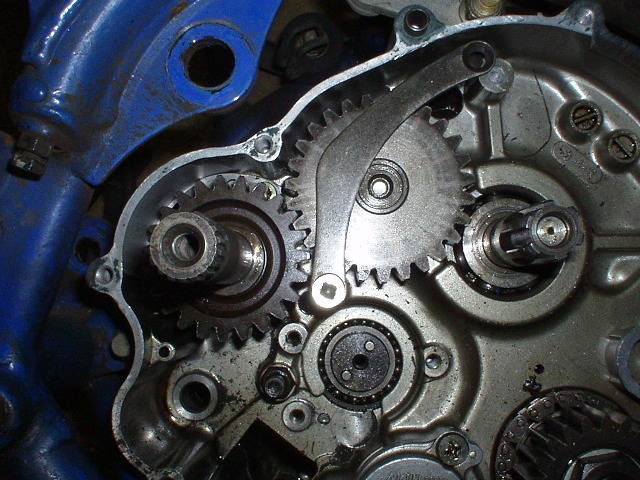
Schön zu erkennen die Sichel, mit der das zu ergänzende Leerlaufrad gesichert wird.
After you disassembled the brake pedal an the foot peg you can uncouple the clutch cable. Then you can drain the oil and remove the the clutch-housing cover.
Now you can clearly see the crescent-shaped securing plate that secures the idler wheel.
| Das Leerlaufrad samt Laufhülse. The idler wheel of the kickstart spindle with bushing. |
Hier muss es hin. There’s the position. |
| Passt! Fits! |
Sicherungsichel anbringen. Now install the crescent-shaped securing plate. |
| Die Anschläge der Kickstartwelle samt Schrauben… The stops of the kickstart spindle and the screws… |
…werden in dieser Stellung… …have to be installed this way… |
| …an dieser Position angebracht. …in this position. |
Auf diese Scheibe… Pay attention to this disc… |
| und richtigen Sitz achten! and its correct position! |
Die auf der Kickstarterklaue eingestanzte Markierung muss am Strich auf der Kickstartwelle ausgerichtet sein. The mark on the gearing has to be aligned with the mark on the kickstart spindle. |
| Kickstartwelle einsetzen. Insert the kickstart spindle. |
Passt! Fits! |
| Feder samt Hülse mit Kerbe zur Federaufnahme. This is the return spring with guide sleeve. |
Feder wie abgebildet einhängen, dabei mit einer halben Umdrehung im Uhrzeigersinn vorspannen. Install the spring like this and preload it by turning it clockwise for 180 degree. |
| Kupplungskorb aufsetzen, jetzt ist auch klar, wo das Leerlaufrad greift. Insert the clutch cage. Now you can imagine how the idler wheel works. |
Passt. Anzugsdrehmoment des Kupplungskorbhalters: 40-60 NM. It fits. Tightening torque of the clutch cage is 40-60 NM. |
Anschließend Kupplung zusammenbauen, Gehäuse-Simmering einsetzen und den Gehäusedeckel aufsetzen. Vorher Dichtflächen reinigen und Dichtung leicht einölen. Kickstarthebel befestigen. Kupplungsschwenkarm aufsetzen – schlau, wenn man vorher eine Markierung gemacht hat – Kupplungszug einhängen, dann noch Bremshebel und Fussraste anbringen – FERTIG!
Now you can assemble the clutch, install the radial shaft seal and fix the clutch-housing cover. But before you should clean the sealing area and lubricate the clutch cover sealing. Then attach the kick starter, the kickstart lever (a clever move is to mark the position) and reinstall the clutch cable. At last you have to mount the brake pedal and the foot peg – done!
Ein ganz spezielles Dankeschön geht an Hajo für die Bereitstellung der tollen Bilder und jede Menge Techtips!
Special thanks to Hajo for the good and detailed pictures and his fine tech-tips and to Ingo for the english translation!


